Belly fat is one of the most common weight gain woes . Here are yoga asanas that can help you shed that stubborn belly fat, hip and waist fat.
When done regularly, yoga can help you lose belly fat that will help you be more flexible and improve your posture. Whether you are an experienced yogi or a complete newbie, adding these ten poses into your routine will accelerate your results—and they won’t require any special equipment!
Yoga is a great way to keep your body agile and flexible. Although some postures may be difficult for you to execute, with practice and patience you will achieve good results.
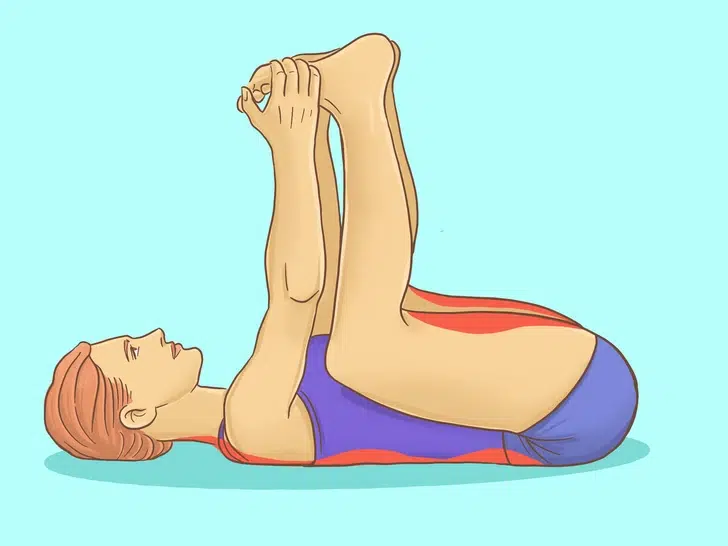
1. Ananda Balasana, or Happy Baby Pose
Lie on your back and bring your knees toward your chest, taking your feet on the outside. Make sure your ankles and knees are aligned at a 90-degree angle and hold the pose for at least 60 seconds.
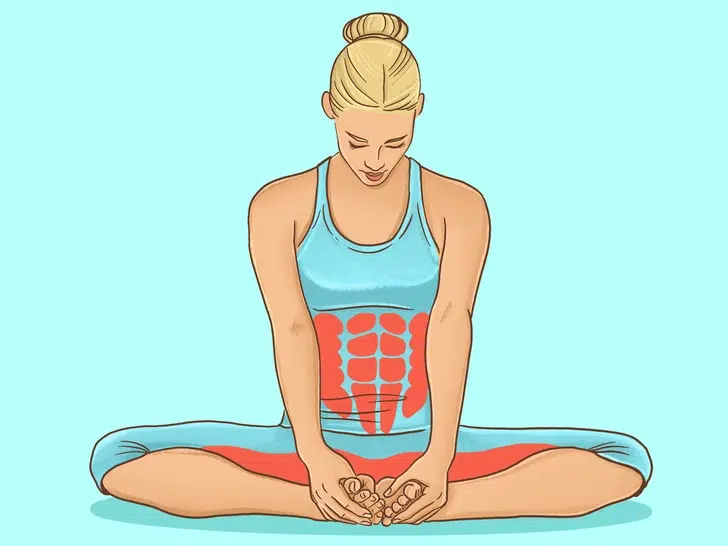
2. Baddha Konasana, or butterfly pose
To perform this posture , sit with your legs stretched and your back straight. Then move your feet inwards, bringing the soles together. Your knees should go down as much as possible. Remember not to curve your back and hold the position for 7 to 10 breaths.
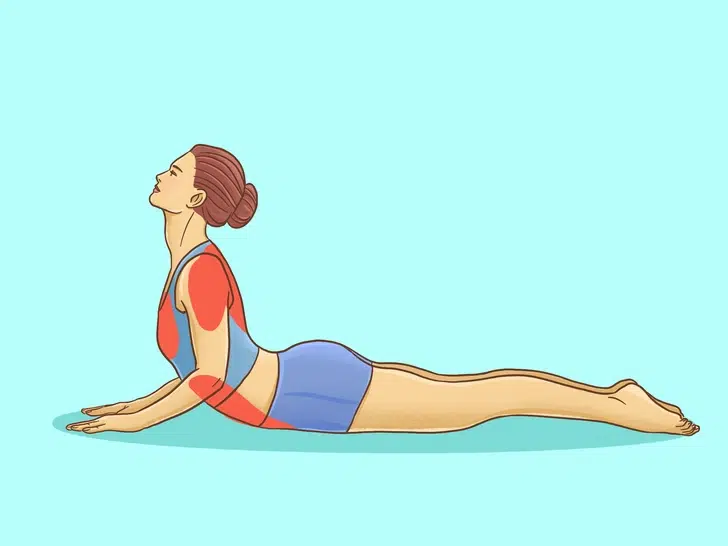
3. Bhujangasana, or cobra pose
The position begins lying face down with the body well stretched. The palms of the hands should be on the floor and at shoulder height and then stretch the arms and lift the chest, but without lifting the pubic bone from the floor and bringing the shoulders back.
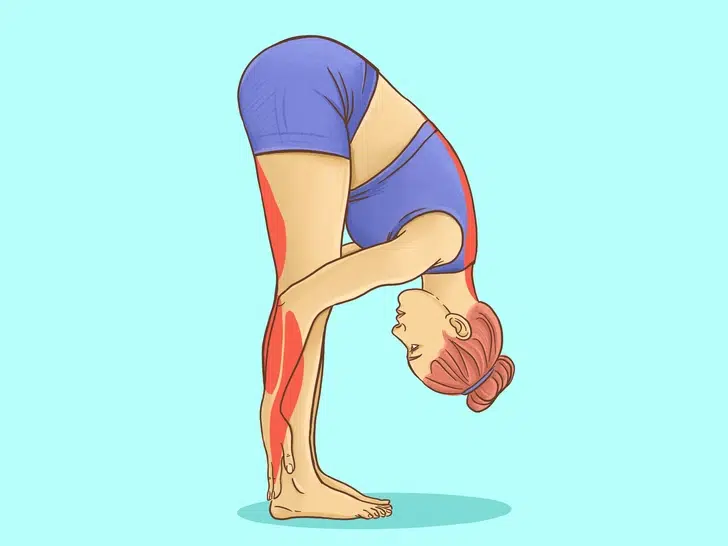
4. Uttanasana, or Standing Forward Bend
Start by separating your legs hip-width apart and spread your toes wide for a better grip. Then bend your trunk forward as you exhale, and, when you have lowered yourself enough, place your legs behind your ankles. If you are a beginner and it is difficult for you to keep your legs and back straight, try bending them a little.
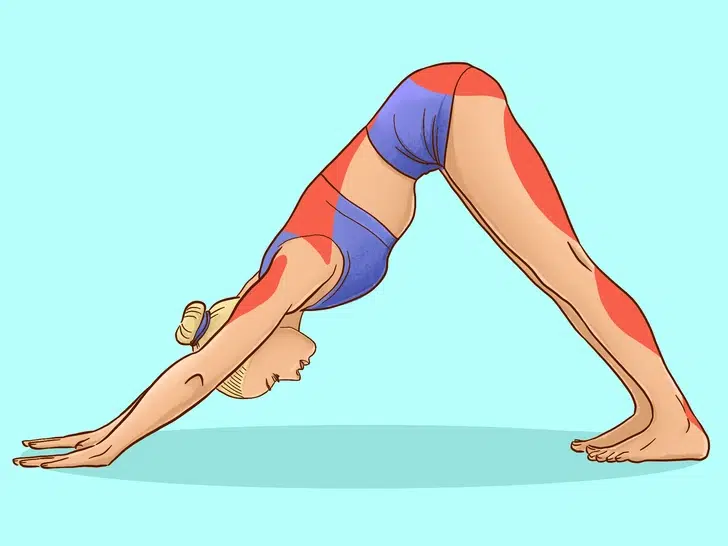
5. Adho Mukha Svanasana, or upside down dog
Start by inhaling as you straighten your legs to lift them and exhale to raise your hips as high as you can. Your legs, spine and arms should be well stretched. Hold the pose for at least 20 seconds and take several deep breaths. To return to the starting position, exhale and gently place your knees on the floor again.
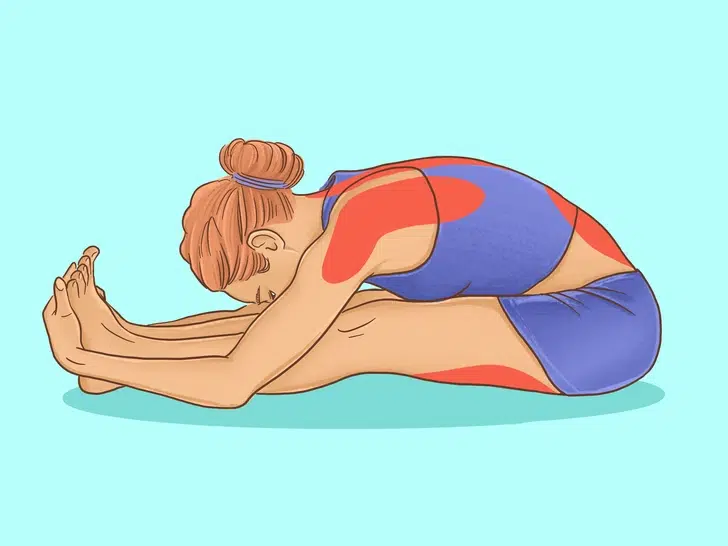
6. Paschimottanasana, or seated clamp
Sit on the floor with your back straight and legs forward. Take a breath and exhale as you lean forward, taking care to move from the hips and not the waist . If you can’t reach your feet with your hands, you can use an elastic band. Hold the position for 1 to 3 minutes.
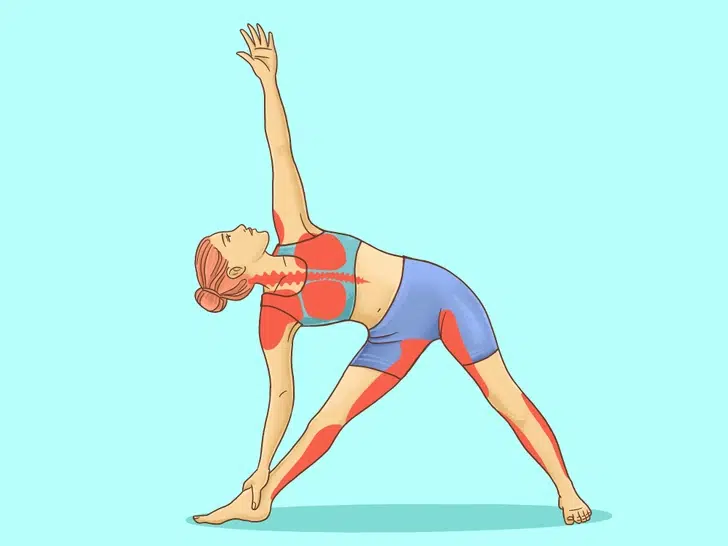
7. Trikonasana, or extended triangle pose
Start by standing on a mat and take a long step with your right leg to the side. The legs should be separated from each other and well stretched. The right foot should point outward, and the left foot should point forward. Then, form a cross with your arms and lower yourself, bringing your right hand to the leg on the same side while raising your left arm, as seen in the image.
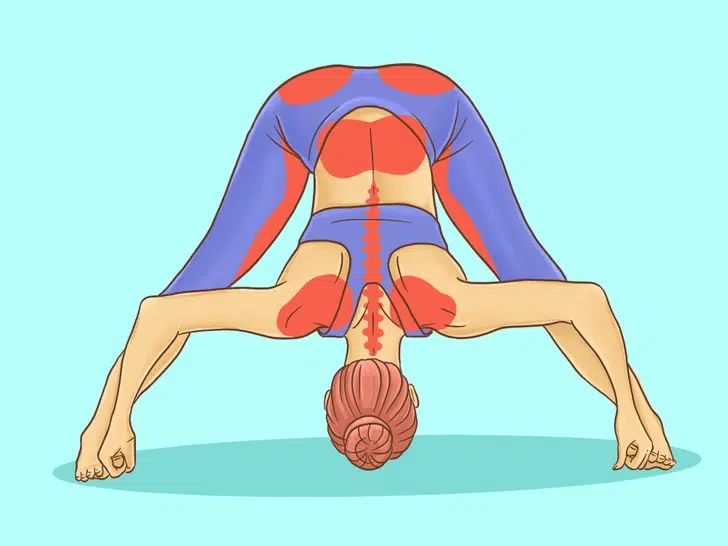
8. Prasarita Padottanasana, or wide angle pose
Start by standing with your back straight. Spread your legs wide and bring your body forward and then down, holding your hands on your legs. Hold the pose for at least 30 seconds and up to 1 minute.
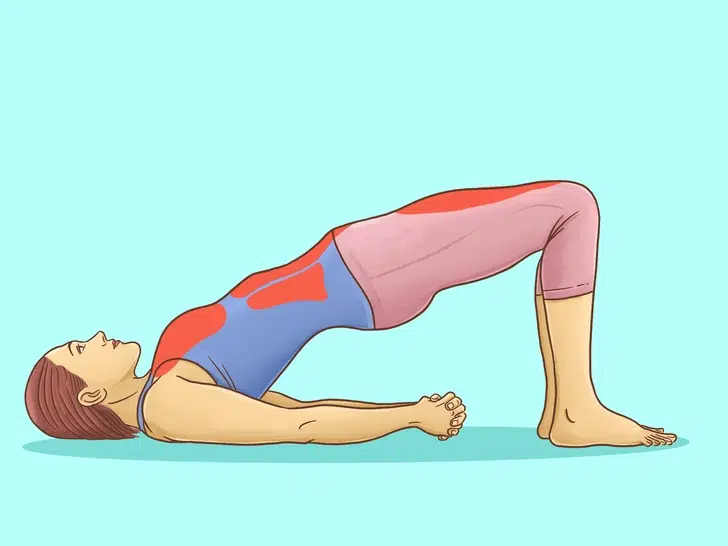
9. Setu Bandha Sarvangasana, or bridge pose
Start face up with your body stretched. Then she bends her knees and places her heels where her knees were before. Your hips should be elevated, and your back should be well stretched. Form a line from the knee to the shoulders. Under this “bridge” the fingers of the hands should be intertwined. Hold for at least 15 seconds.
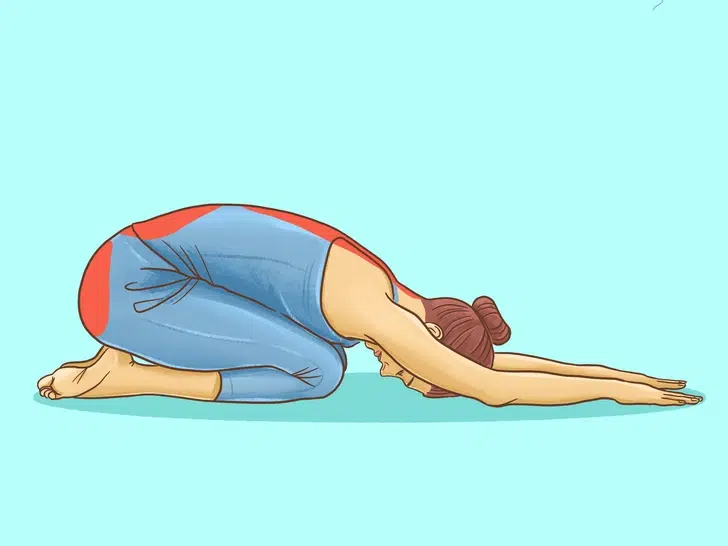
10. Balasana, or child’s pose
Start on your knees with your back straight and legs close together. Then bring your glutes to your heels. Consider that your legs should be in contact with your chest and your head will rest on the floor. There are two variants: with the arms stretched forward or at the sides next to the feet. Both function as a final relaxation and should be maintained for approximately one minute.

